Last week we learned how Pix 4D is a powerful tool used in creating excellent orthomosaics and 3D models using geotagged images from the Canon SX260 camera and GEMs imagery with imported GPS coordinates. This week we are using our data collected during our fourth field activity and using ground control points or GCPs to increase the geographic and aesthetic elements of the created geo-referenced mosaics and models.
Summary of Methods
For data collection details refer to link above, but in review: Data was collected using a Canon SX260 camera with CDHK software installed so images could be taken at set intervals over the course of the mission. Before the mission began, 6 GCPs were placed around the study area and the high precision Topcon Positioning System was used to mark each GCPs latitude, longitude and altitude. The Topcon data was saved to a text file to be later imported to Pix4D. The SX260 was mounted to the Matrix UAV to take nadir imagery and a waypoint data was uploaded to the Matrix via Mission Planner. Data was then uploaded to a shared file to be analyzed.
There are multiple ways to add GCPs to a project in Pix 4D. Those being:
- Measuring in the field with topographical equipment much like we did
- Taking GCPs from currently existing geospatial data and finally taking GCPs from a web map service. So you don't necessarily need your own GCPs, however your final project will be a lot more accurate if you mark
- Through collecting GCPs specific to your project.
Like mentioned earlier, our data was processed using the first method. First, our data which consisted of around 340 georeferenced pictures was added to our Pix4D project, following the same steps as last week. For this exercise we had to select a coordinate system, which for where our study was done was NAD83/UTM zone 15N, which can be found in the drop down menu. After creating the project, the text file containing our GCP information via clicking on the layers menu on the left column, selecting GCP and then Manual Tie Point Manager. It is important to know how your coordinate system is stored since Pix 4D displays them YXZ. Verify your coordinates are cooret before moving on. Once this was done, Initialization was started, making sure the other processing steps remained unchecked. This will show you your initial processing before you optimize the images to the GCPs.
 |
| Figure 1: Initial Processing Quality Report. Notice that no GCPs were used in the making of these mosaics as indicated by the exclamation point by the Geo-referencing check. |
 |
| Figure 2: GCP calibration images. Yellow circles indicate a calibrated image and the Green X indicates the new, universal location of the GCP in your imagery |
 |
| Figure 3: Optimized data quality report. Notice how the study area grew in size with the addition of GCPs. |
 |
| Figure 4: Map of study area with overlayed GPS coordinates as calculated by various GPS enabled units |
 |
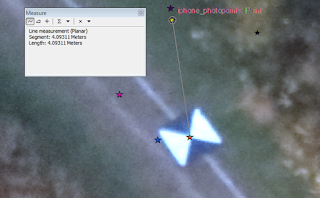
| Figure 5: Measuring distance between the Topcon GPS unit and the iPhone |
Conclusion:
Pix4D remains to be a user friendly source for processing geospatial data and as shown above becomes even more accurate with the addition of GCPs. It is worthy to note that you do not need to have collected GCP data before collecing your imagery data, but do know that the quality of your project depends on the amount of work that you put into data collection, so for accurate results, collect GCPs with the most accurate means possible. Collecting GCP data is considered a must when it comes to conducting long-term surveys and I would uphold my suggestion from last week to use Pix4D for processing your data.
No comments:
Post a Comment